
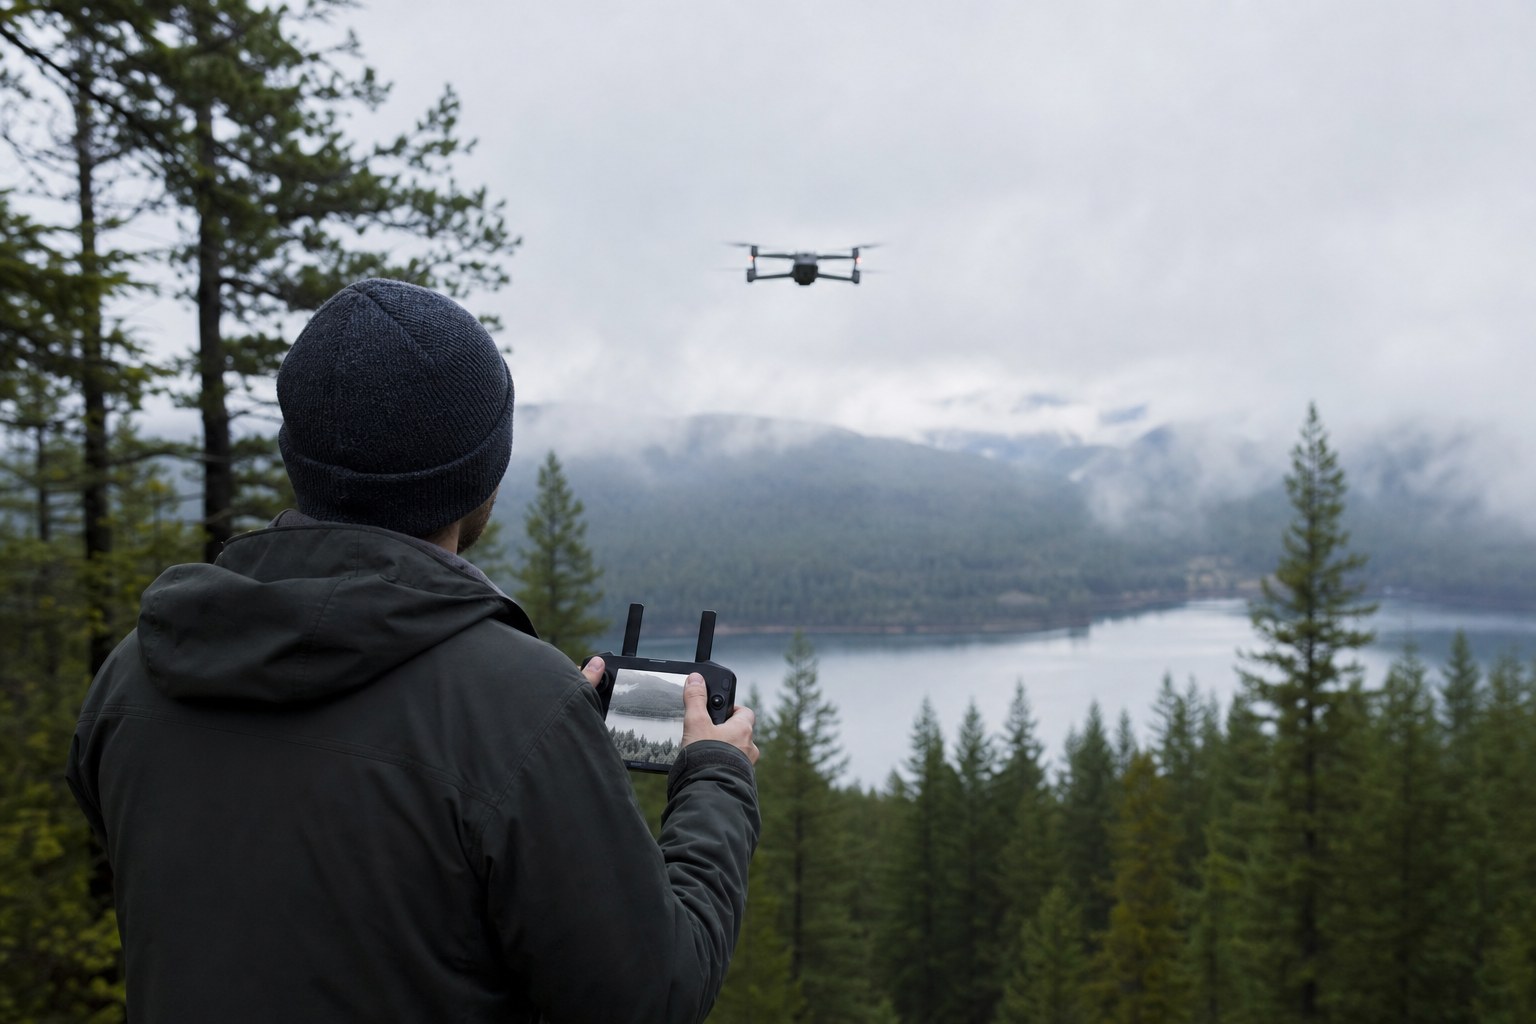
The short answer: to color DJI drone footage, apply a D-Log to Rec.709 conversion LUT first, then your look on top. Check the camera menu before you start, because D-Log and D-Log M are different curves and the wrong one turns your greens muddy. The conversion is a translation, not a finished grade, and that second step is the one most people are missing. Our conversion LUT is free, further down this page, and there are also look LUTs that do both jobs in a single file.
D-Log and D-Log M are not the same thing
This trips up more people than anything else, and it is the reason a LUT can look completely wrong even when everything else is correct.
D-Log is the full log profile on the larger drones. It holds the widest dynamic range and needs a proper conversion before it looks like anything.
D-Log M is a lighter version found on the smaller drones and the handheld gimbal cameras. It sits closer to a normal image out of the camera, with less range to recover.
Apply a D-Log LUT to D-Log M footage and the midtones go green and milky. Do it the other way around and the shadows crush. Neither is a fault in the LUT, it is the wrong curve.
How to check what you shot in: open the camera settings in the DJI app or on the controller and look under colour or picture profile. It states D-Log or D-Log M explicitly. If it says Normal, there is no log curve and no conversion should be applied at all.
Do you still need to grade after applying the DJI LUT?
Yes, and it is worth understanding why rather than just accepting it.
The conversion does one job: it moves the footage from the log curve back to Rec.709 so it looks correct and neutral. It is a translation, not a look. It does not know what your shot is, what time of day it is, or what mood you are after.
After the conversion you still need to balance exposure, since log is usually exposed to the right to protect the shadows, fix white balance, which drifts blue over water and snow and green over fields, and then add the look itself.
So the DJI LUT is not pointless. It is the first of two steps. The mistake is expecting it to be the only one.
From flat D-Log to a finished look
See it in motion
This skips the conversion entirely. The DRONE LUT pack is built specifically for drone footage, and every look has the matching DJI conversion inside the file. You do not convert first and then grade on top. One LUT takes the clip from flat grey straight to finished, and there are separate versions for D-Log and D-Log M so the curve is always right.
What’s included
| Looks for D-Log | 20, conversion built in |
| Looks for D-Log M | 20, conversion built in |
| Looks for Rec.709 | 11, for non-Log footage |
| Conversion LUTs | 2, one for each DJI curve |
| Total files | 53 LUTs, 33-point .cube |
| Works in | Premiere, DaVinci, Final Cut, LumaFusion |
$44.9553 LUTs, instant downloadGet the DRONE LUT pack
Before and after
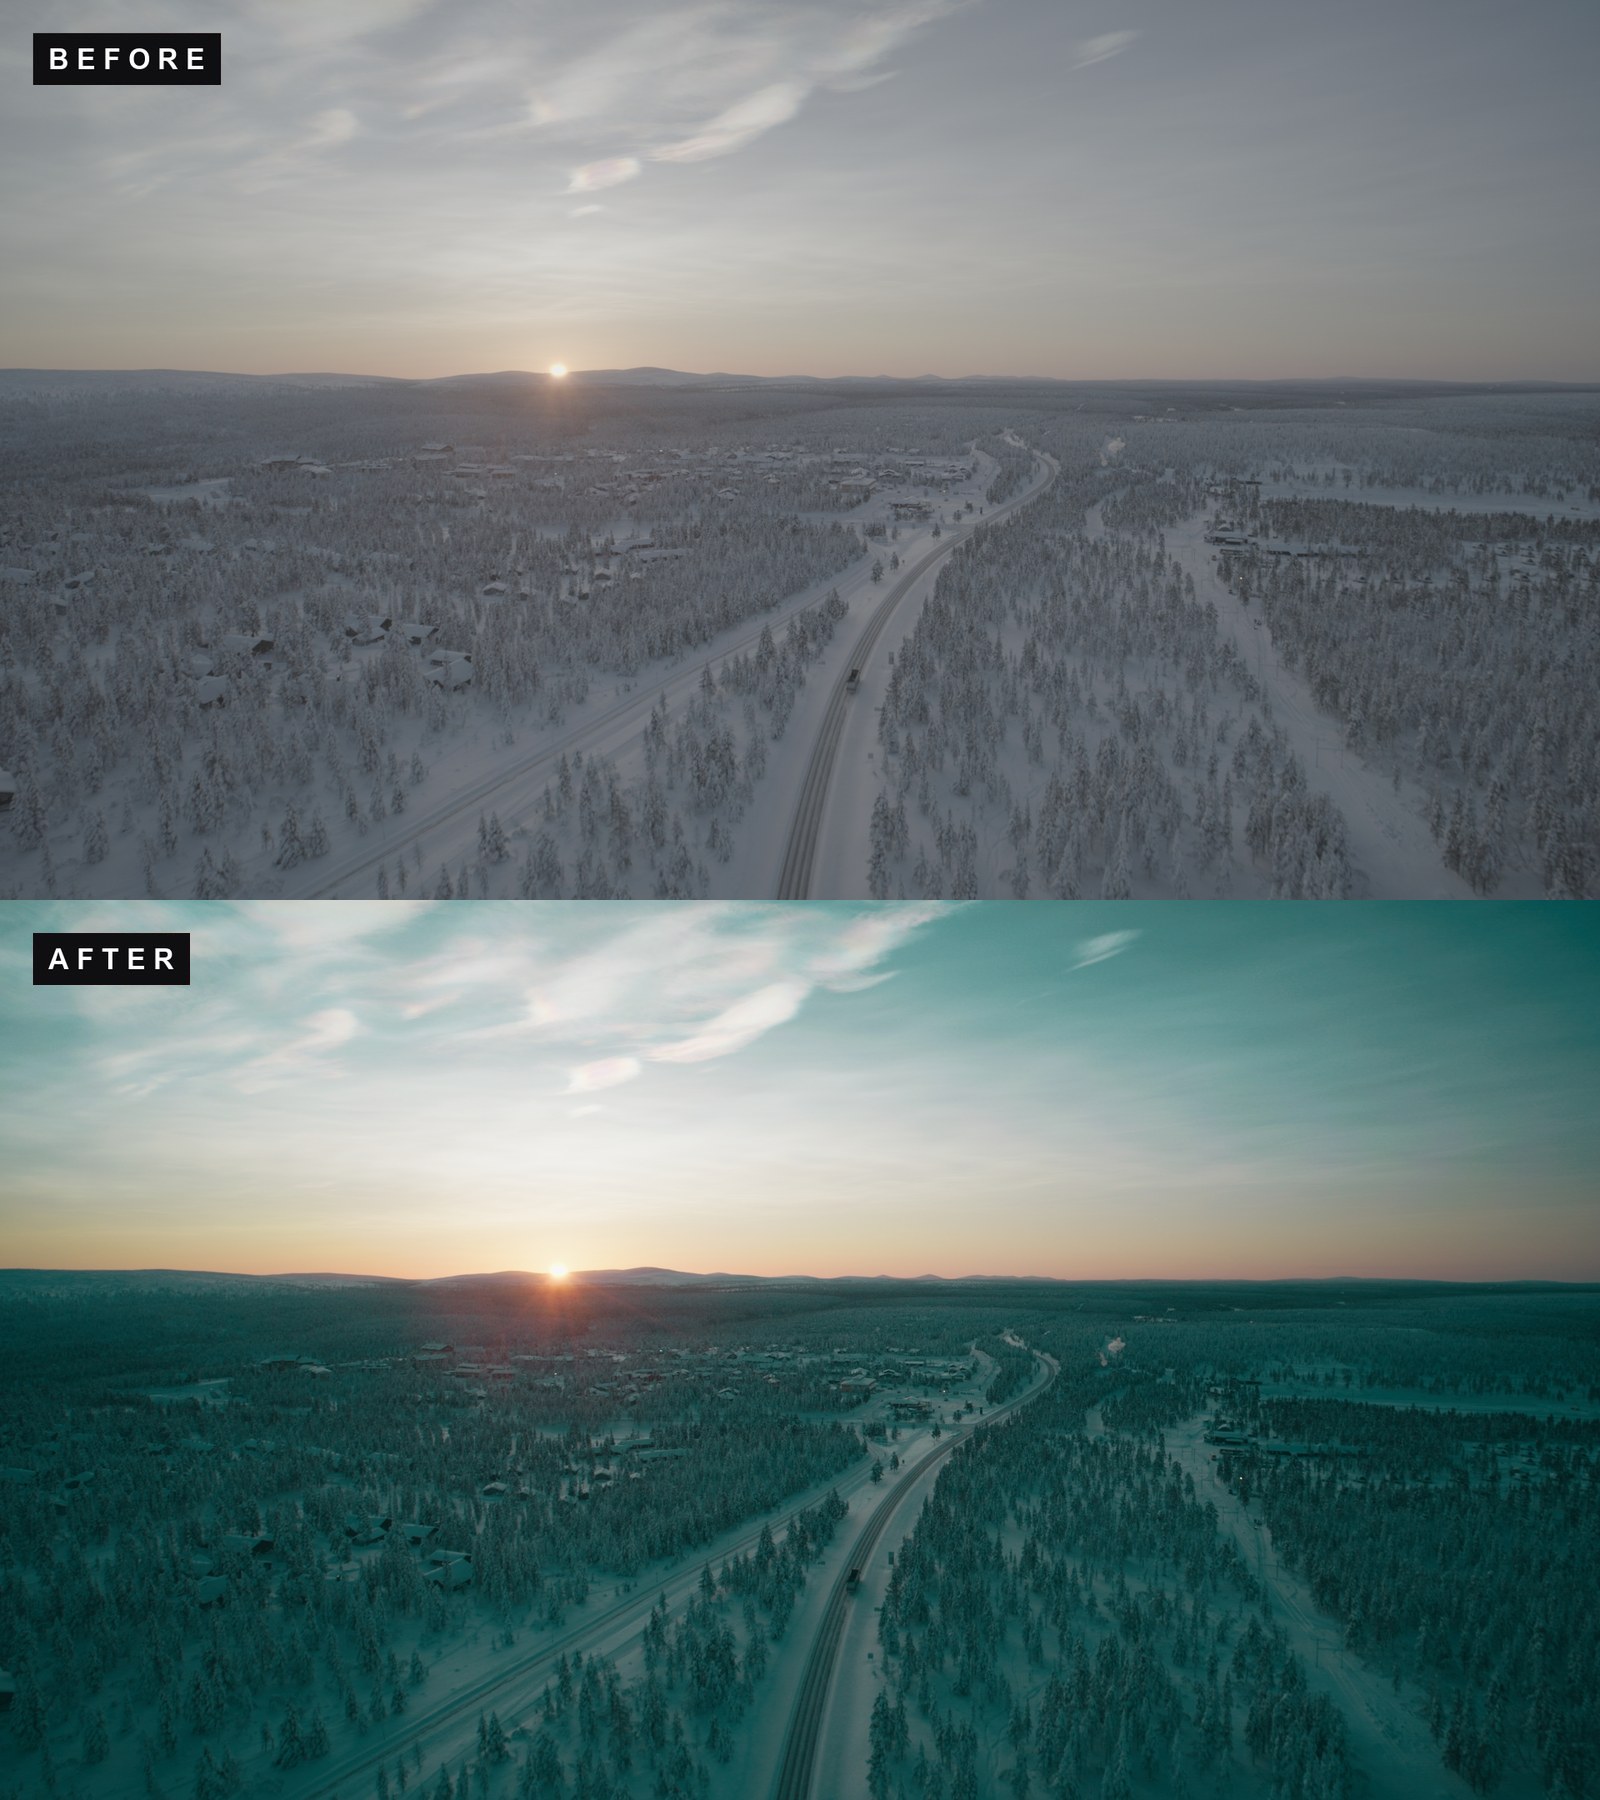 DRONE DD7 LUT
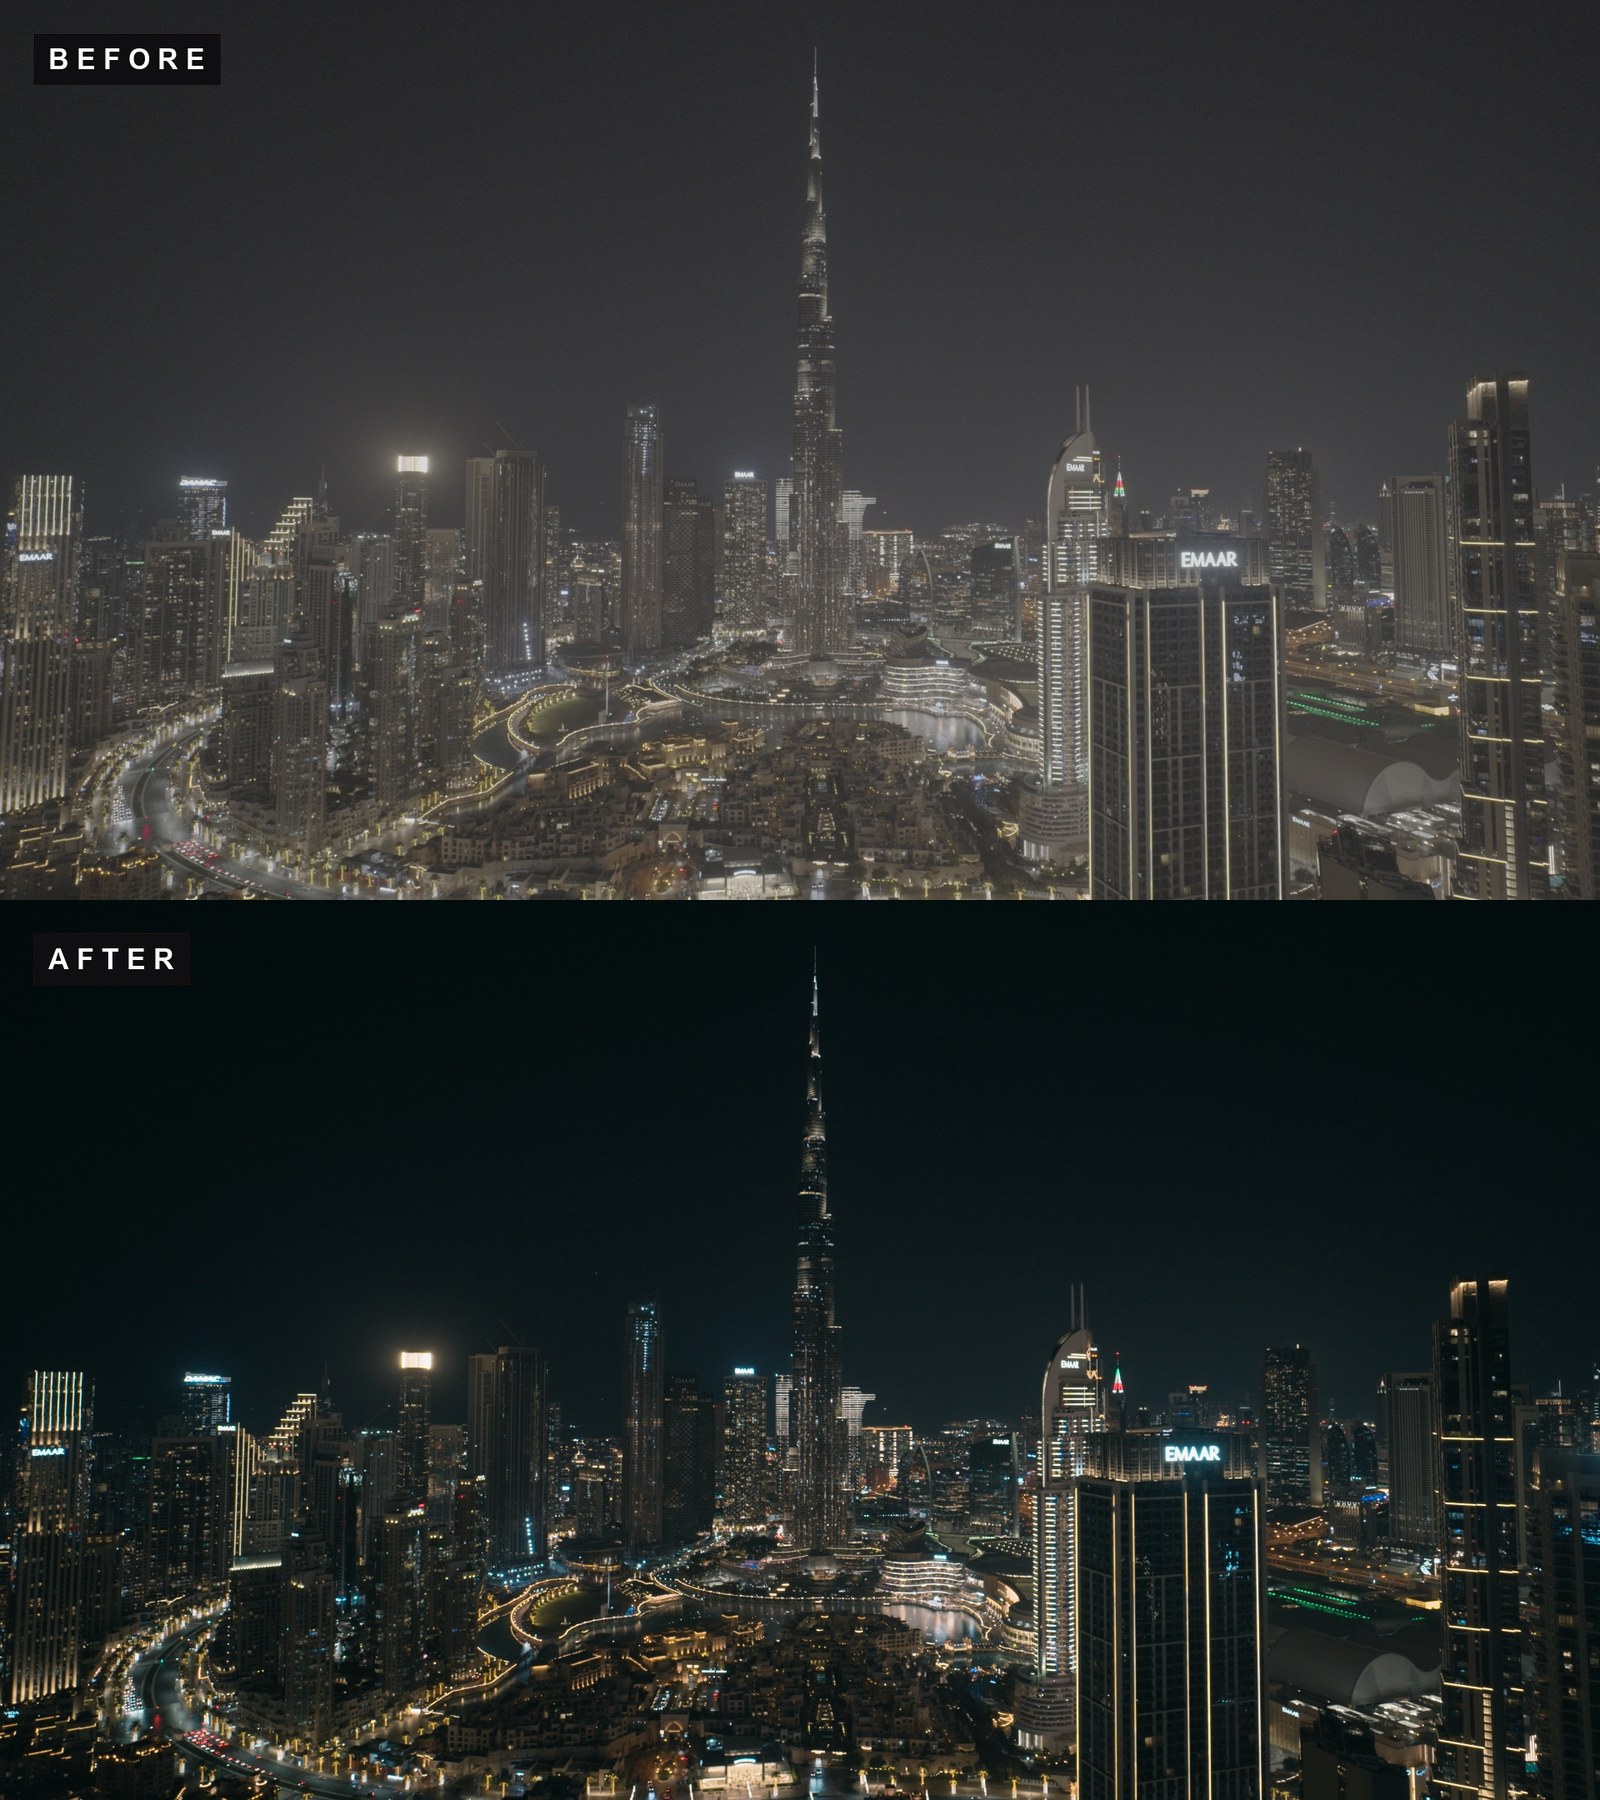 DRONE DD2 LUT
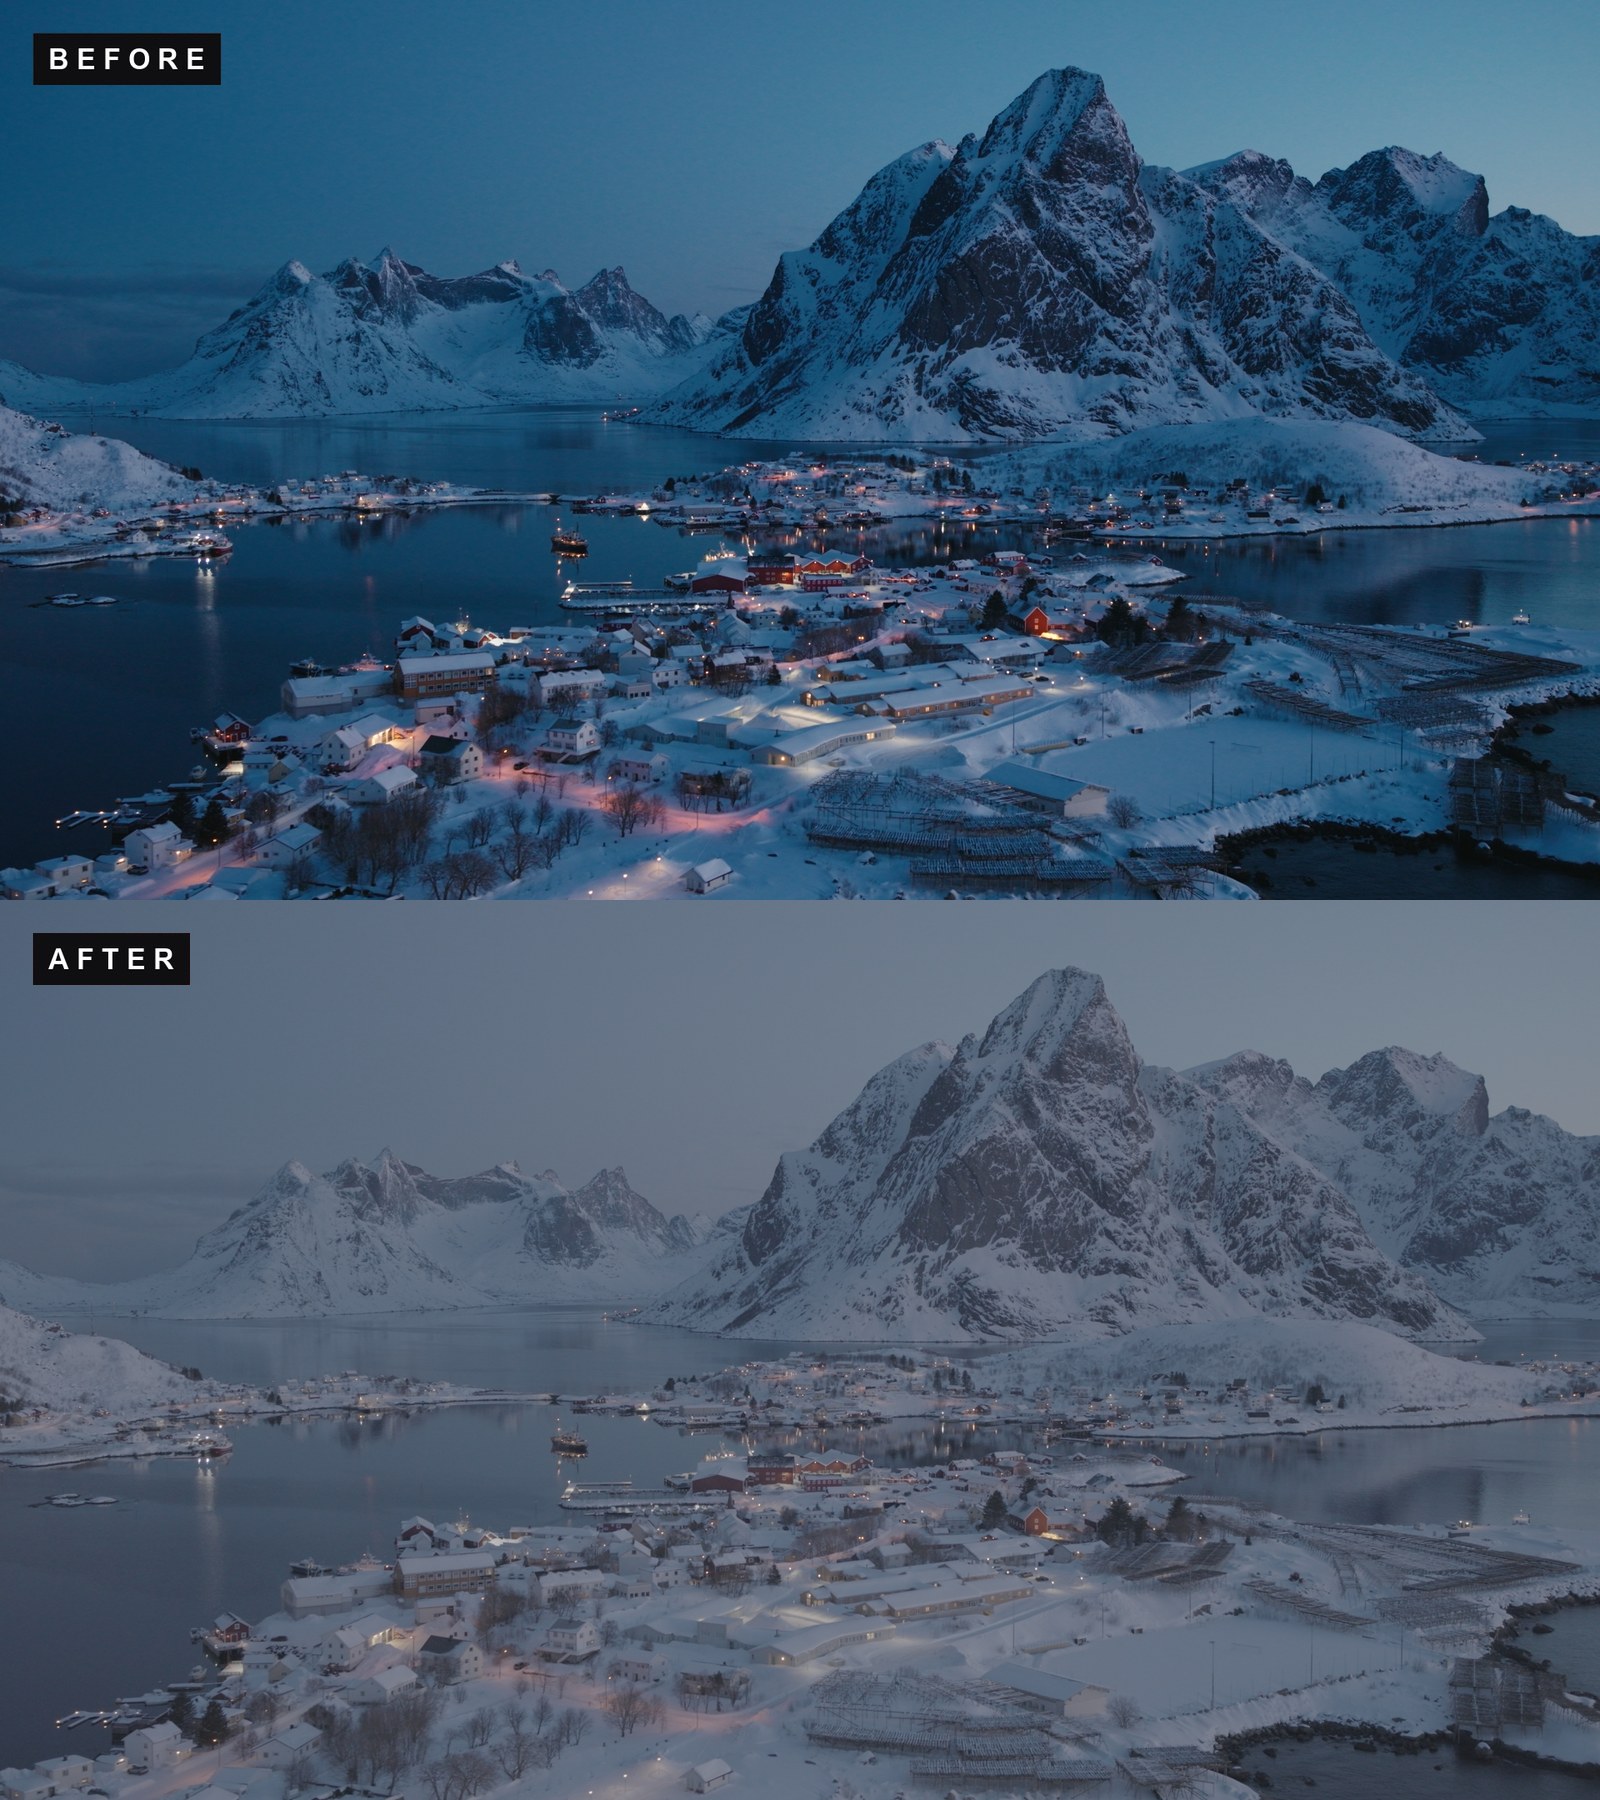 DRONE DD5 LUT
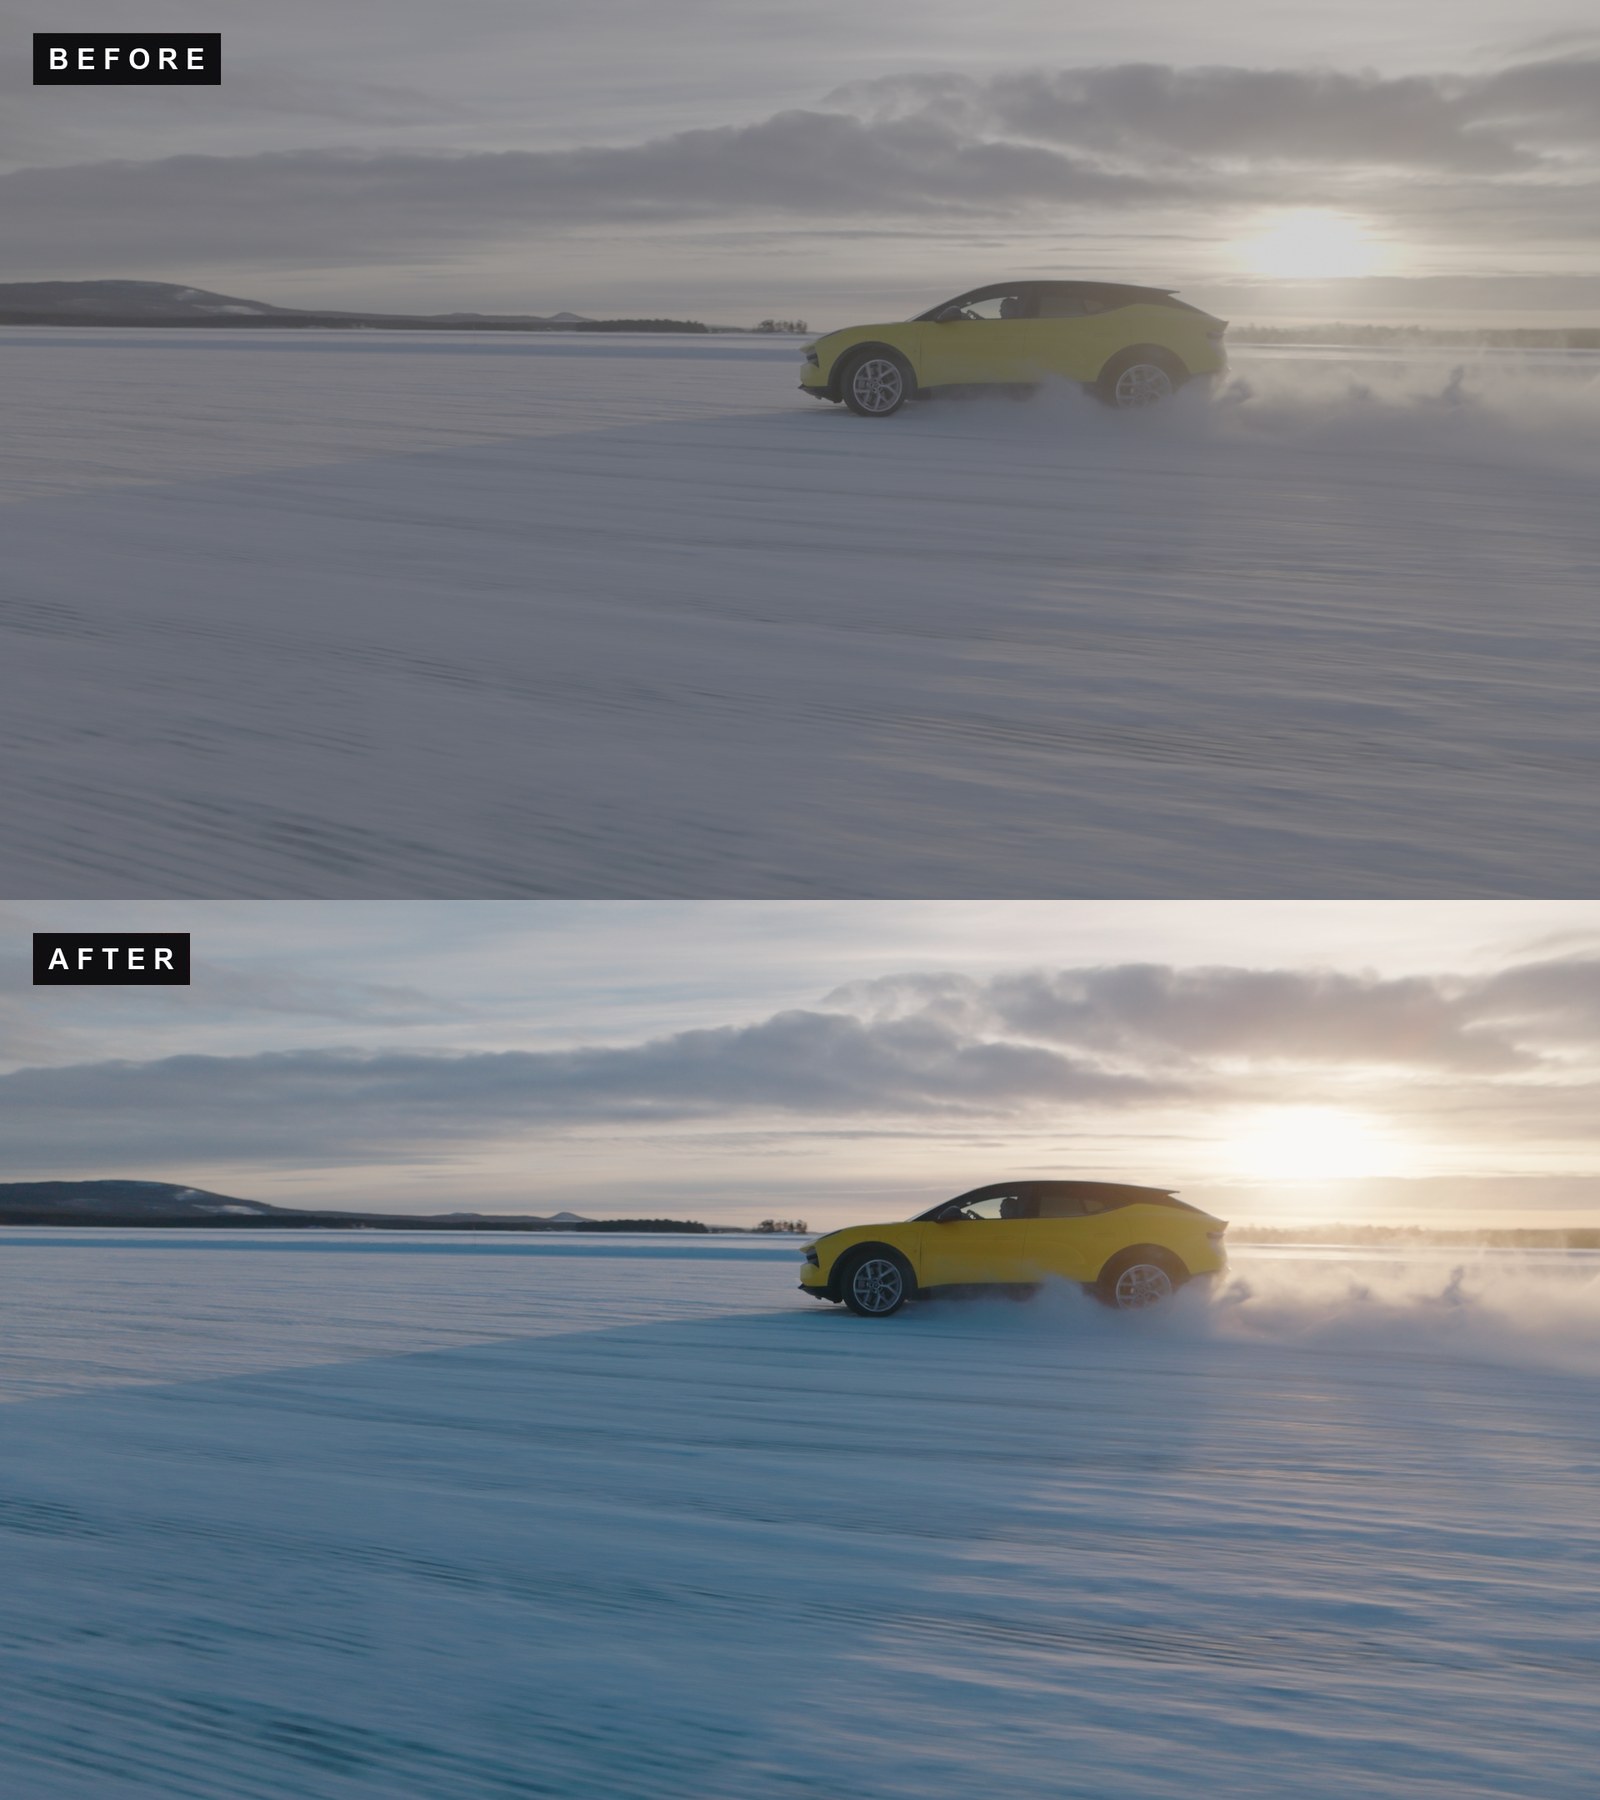 DRONE DD16 LUT
$44.9553 LUTs, instant downloadGet the DRONE LUT pack
Download the free conversion LUT
Get the free DJI D-Log to Rec.709 LUT here, a 33-point .cube plus a 17-point monitor version. Drop it on the first node of your grade and the footage lands on a neutral, correct starting point. Works with the Mavic series, Air, Inspire and any DJI camera recording full D-Log.
It gives you the neutral base described above, and the look is then yours to build. If your clips are D-Log M, which is what the smaller drones record, you need the other curve. That conversion ships inside the DRONE LUT pack together with the looks, so one file there handles the conversion and the grade at once.
How to install and apply DJI LUTs in DaVinci Resolve
- Copy the
.cubefiles into the LUT folder. Open Project Settings > Color Management > Lookup Tables and click Open LUT Folder, then paste the files into a subfolder, for example Lutcraft. - Click Update Lists in the same panel. Skip this and the LUTs will not appear.
- Go to the Color page and select your clip.
- Right click the first node, choose LUT, then your folder, then the conversion that matches your curve.
- Add a second node for the look, and a third for exposure and white balance.
If the LUT does not show up: the list was not refreshed, or the files sit loose in the root instead of in a subfolder. Update Lists solves it in almost every case.
How to install and apply DJI LUTs in Premiere Pro
- Select the clip and open the Lumetri Color panel.
- Under Basic Correction > Input LUT, choose Browse and pick the conversion file.
- Add a second Lumetri effect on the same clip for the look, applied under Creative > Look.
“The LUT does not stay in the list” is a common complaint with a specific cause: browsing to a file applies it to that clip only. To make LUTs appear permanently in the dropdown, place the .cube files in Premiere’s own LUT directory and restart the application. Use the Technical folder for conversions and Creative for looks, since Premiere reads both at startup.
How to install and apply DJI LUTs in Final Cut Pro
- Select the clip and add the Custom LUT effect from the effects browser.
- In the inspector, open the LUT dropdown and choose Choose Custom LUT.
- Point it at the conversion file.
- Add a second Custom LUT effect above it for the look.
Final Cut applies effects from the bottom up in the inspector, so the conversion must sit below the look, not above it.
Why your D-Log footage still looks flat, yellow or green
Green or muddy midtones. Almost always the wrong conversion. A D-Log LUT on D-Log M footage pushes greens grey and lifeless. Check the profile you actually recorded in before touching the colour wheels.
Flat even after the LUT. The conversion is probably applied after the look instead of before it, or the timeline is colour managed and converts the clip a second time. In Resolve, check that Color Science is set to DaVinci YRGB rather than YRGB Color Managed when you convert manually with LUTs.
Banding in the sky. Clear skies are the hardest case for compression. Record at the highest bitrate the drone offers and split the grade across several nodes instead of pushing contrast hard in one.
Too bright after conversion. That is expected. Log is exposed to the right on purpose. Pull exposure down after the conversion, never before it.
Which DJI drones record D-Log and D-Log M?
The split follows the size and purpose of the drone rather than the release year. The larger, more cinema oriented models record full D-Log, while the smaller consumer models and the handheld gimbal cameras record D-Log M.
Rather than trusting a list that goes out of date with every firmware release, check the camera menu under colour or picture profile. It takes ten seconds and removes all doubt, which matters because the wrong conversion is the single most common reason a drone grade looks broken.
The workflow, start to finish
- Shoot in D-Log or D-Log M at the highest bitrate available.
- Check which profile the clip was actually recorded in.
- Apply the matching conversion to Rec.709 as the first step.
- Correct exposure and white balance.
- Apply the look.
- Finish with final contrast and grain.
FAQ
Can I skip the conversion and just use a creative LUT?
You can, but the result is unpredictable. Creative LUTs are built for Rec.709 footage. Applied straight onto a log curve they crush shadows and shift colour.
Does the official DJI LUT work?
It converts the footage correctly, which is what it is meant to do. It gives you a neutral starting point, not a finished image. The grading still happens after it.
Can I fix footage that was not shot in log?
Partly. Standard footage has contrast and colour baked in, so there is less to recover. Looks still work, they just have less room to move.
Does this work with Osmo and the handheld DJI cameras?
Yes. They use the same log curves, so the same conversions apply. Check the profile in the menu as always.
What about D-Log 2?
Newer firmware has introduced updated curves on some models. Check the exact name in the camera menu and match the conversion to it. Close is not the same.